How to Prepare Massachusetts & Rhode Island Roofs for Solar Panels
Solar Ready Roofing Guide: How to Prepare Your Massachusetts and Rhode Island Home for Solar Panel Installation
Preparing a solar-ready roof means ensuring your roof’s structure, materials, orientation, and permitting are aligned so solar panels perform safely and reliably over decades. This guide explains what “solar-ready roofing” entails, why roof readiness matters for energy production and long-term value, and how homeowners in Massachusetts and Rhode Island can evaluate and prepare their homes for a smooth solar install. You will learn the key physical requirements installers check, which roofing materials work best in New England weather, a step-by-step assessment and permitting checklist, financing and incentive options that can offset costs, and seasonal maintenance practices to protect both roof and array. Practical lists, comparison tables, and inspection checklists make the process actionable, while local context addresses MA and RI programs and permitting nuances. If you’re considering a combined roof and solar project, this guide also outlines how integrated service providers can simplify coordination through site surveys, discovery calls, and bundled roof + solar offerings.
Preparing Your Roof for Solar Panels: MA & RI Homeowner Guide
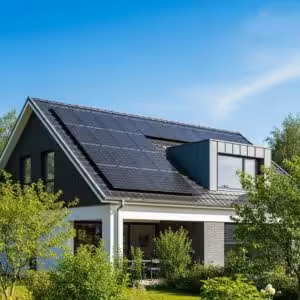
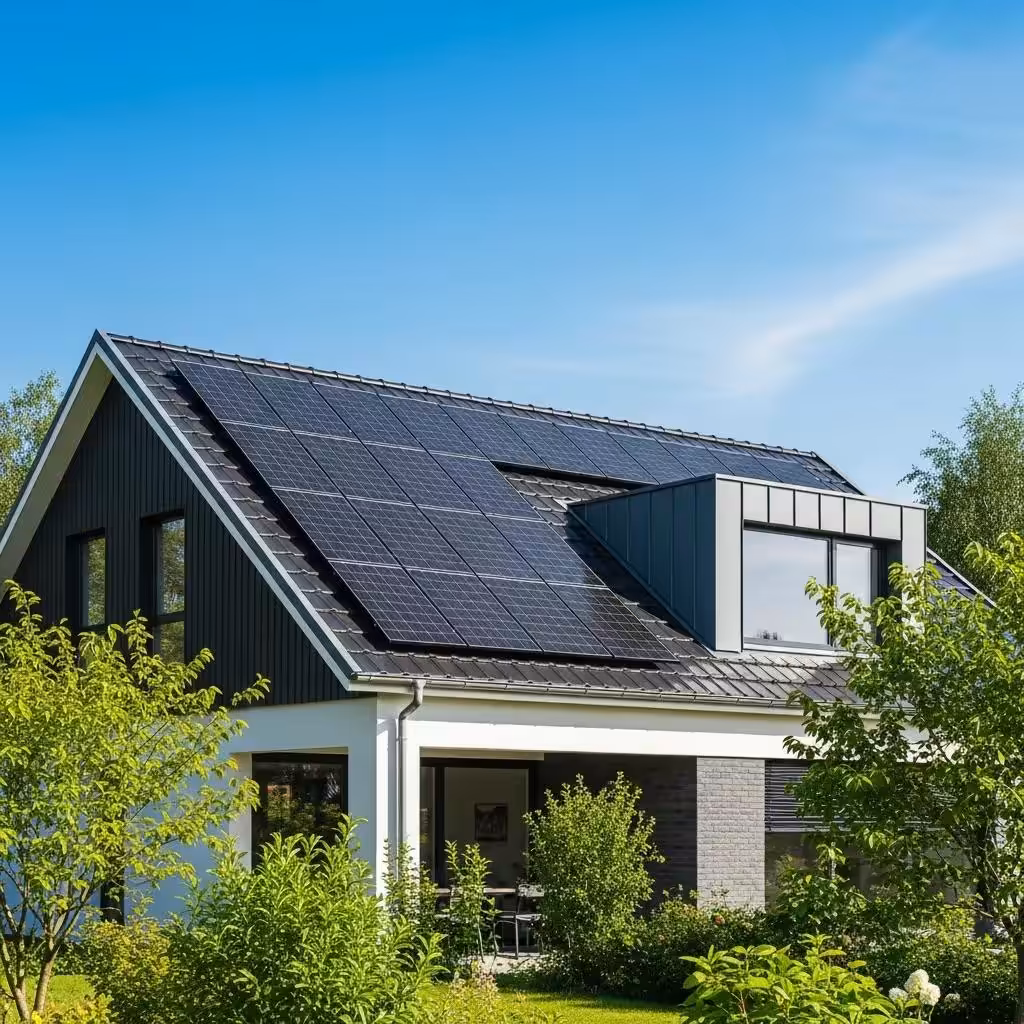
A solar-ready roof must meet structural, age, orientation, and shading criteria so panels can be mounted safely and produce predictable energy. Structural integrity and load capacity determine whether the roof can carry the weight of panels, rails, and potential snow loads; inspectors evaluate rafters, decking, and attachments for adequacy. Remaining roof lifespan is critical because replacing shingles or decking after panels are installed adds unnecessary costs; installers prefer at least 10–15 years of useful life remaining. Orientation, pitch, and shading influence energy yield—south- or southeast-facing slopes with moderate pitch and minimal shading are ideal in New England. These requirements together protect the homeowner’s investment and streamline permitting and interconnection with utilities.
Top roof requirements summarized:
- Structural soundness with adequate load capacity and secure attachment points for mounting hardware.
- Sufficient remaining roof lifespan (typically 10–15+ years) to avoid rework under arrays.
- Favorable orientation and pitch with minimal shading to maximize production.
- Compatible roofing materials and intact flashing to ensure watertight mounts.
This high-level checklist leads naturally into a more detailed comparison of specific roof elements and recommended corrective actions for each.
Intro to comparative requirement details:
| Roof Element | Requirement | Typical Corrective Action |
|---|---|---|
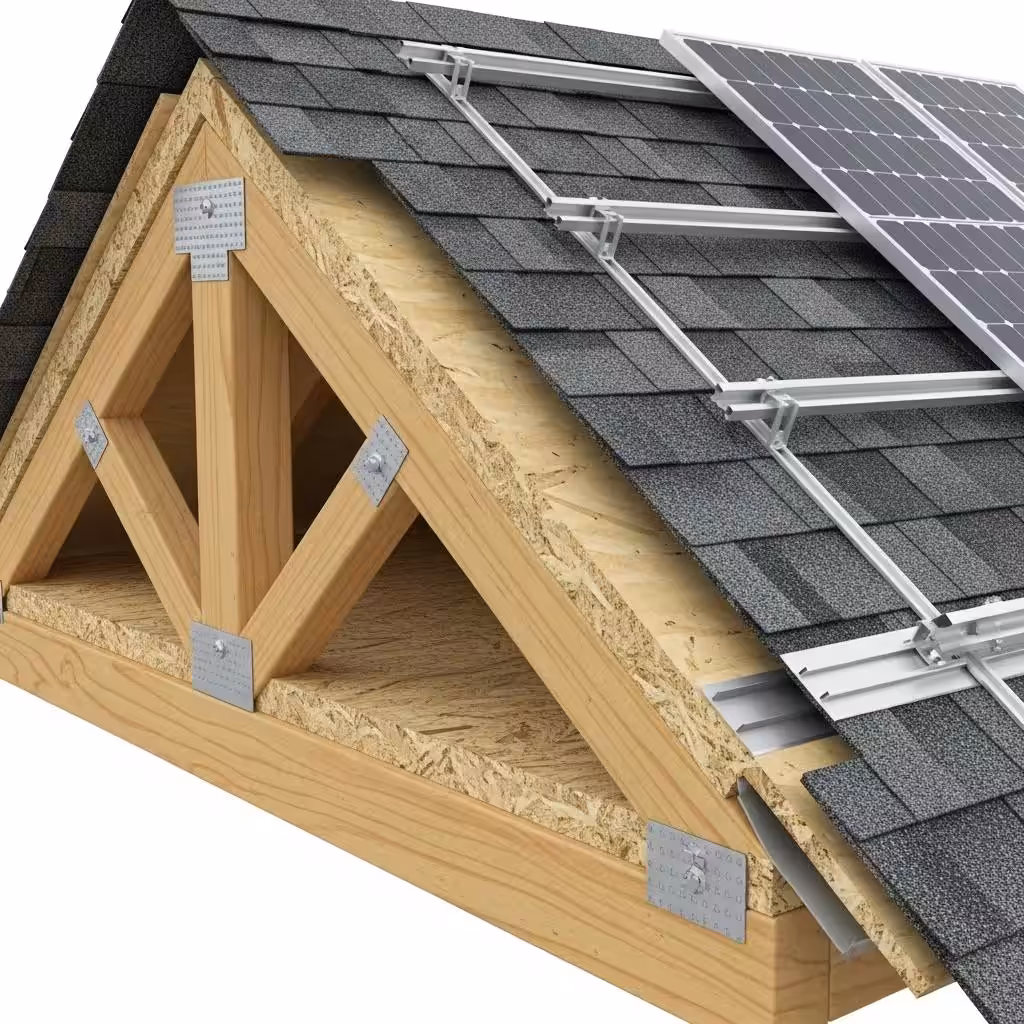
| Roof decking | Solid, dry plywood or OSB with no rot | Replace or sister decking panels; install new sheathing |
| Rafters/trusses | Adequate spacing and load capacity for panel + snow loads | Reinforce or add supports; structural engineer review |
| Flashing & penetrations | Intact, properly sealed flashings at roof penetrations | Replace flashing and reseal around mounts |
| Remaining lifespan | Minimum 10–15 years preferred | Schedule shingle replacement before install if under threshold |
This EAV table clarifies where deficiencies commonly appear and what corrective actions installers recommend to achieve a solar-ready roof.
How Does Roof Structural Integrity Affect Solar Panel Installation?
Roof structural integrity determines if the framing and decking can support the additional dead loads of modules, rails, and dynamic snow loads without excessive deflection or failure. Load calculations combine the weight of equipment with regional snow and wind factors; if calculations show insufficient capacity, a structural reinforcement plan is required. Common indicators of insufficient support include sagging roof planes, water-damaged sheathing, visible rot around eaves, or undersized rafters relative to span. Typical corrective measures range from sistering rafters and adding blocking to replacing sections of framing or installing engineered roof attachments; a structural engineer often certifies the repair. Ensuring structural integrity up front avoids delays during permitting and reduces the risk of post-installation failures.
Indeed, studies highlight the critical importance of proper installation practices to prevent significant roof damage and costly issues for homeowners.
Preventing Roof Damage from Solar Panel Installation
Key findings indicate that improper installation is a primary cause of roof damage, with 65% of homeowners reporting structural issues and 50% experiencing leaks. The study proposes several mitigation strategies, including proper training for installers, using compatible materials, regular inspections, and adherence to industry standards.
Assessing the Detrimental Effects of Solar Panel Installation on Residential Roofing Systems, PD Fakoyede, 2024
Structural findings usually suggest the next step—assessing roof age and surface condition—because material condition and expected lifespan influence whether repairs or a full replacement are the best option.
What Roof Age and Condition Are Ideal Before Installing Solar Panels?
Before installing panels, aim for a roof with at least 10–15 years of remaining useful life to align with the typical 25–30 year lifespan of solar equipment and avoid removing panels for roof work. Inspectors look for granular loss on asphalt shingles, curling or cracked shingles, multiple layers of roofing, and evidence of previous leaks as signs that replacement should precede solar installation. An older roof under panels increases hidden moisture risk, complicates warranty coverage, and often raises total project cost due to later de-installation and re-installation. Homeowners should obtain a professional roof inspection and estimate remaining life; if major repairs or a full re-roof are needed, coordinate replacement before solar to minimize total cost and disruption.
Clearer assessment of material compatibility and longevity leads directly into comparing roofing materials for solar installations in New England’s climate.
Which Roofing Materials Are Best for Solar Panels in New England?
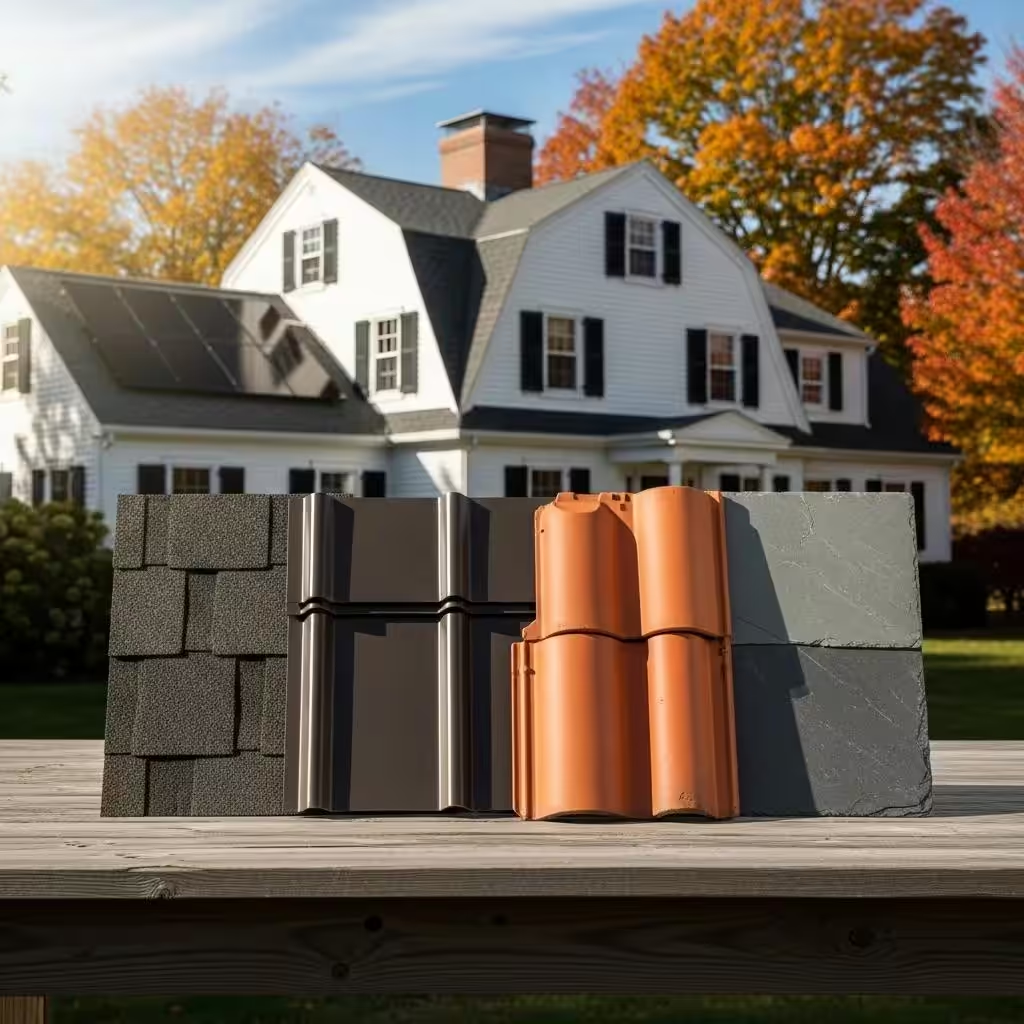
Roofing material affects mounting approach, durability under snow and freeze-thaw cycles, and long-term compatibility with solar attachments. Materials that fasten reliably and allow secure flashing or rail-based attachments simplify installation and maintain watertight integrity in harsh weather. In New England, installers commonly evaluate asphalt shingles, standing-seam metal, and tile/slate options for compatibility with penetrative mounts, rail systems, or clamping methods. Material lifespan alignment with panel warranties matters: selecting a roof material that outlives or matches the expected solar system life reduces future rework. The table below compares common materials by solar compatibility, typical lifespan, and cost considerations to help homeowners decide whether to upgrade before going solar.
Intro to materials comparison table:
| Material | Solar Compatibility | Lifespan (years) | Cost Consideration |
|---|---|---|---|
| Asphalt shingles | High; common for penetrative flashing mounts | 20–30 | Lower upfront cost; may need replacement before panels |
| Standing-seam metal | Very high; non-penetrative clamps possible | 40–70 | Higher cost; excellent long-term pairing with solar |
| Tile/Slate | Moderate; requires specialized mounting and flashing | 50–100+ | Higher cost and skill required; careful flashing needed |
This comparison table highlights trade-offs between upfront roofing spend and long-term durability when pairing roofs with solar systems.
How Do Asphalt, Metal, and Tile Roofs Compare for Solar Compatibility?
Asphalt shingles are the most common residential substrate and work well with standard flash-mounted rails; installers must check sheathing and flashing details to ensure a watertight seal. Standing-seam metal roofs allow clamp-style attachments that avoid roof penetration, improving water integrity and often simplifying installation in snowy climates where sliding snow is a concern. Tile and slate present aesthetic and longevity benefits but require specialized mounting hardware and careful flashing to prevent cracks and leaks during and after installation. Snow and ice behavior varies: metal sheds snow more readily, reducing load accumulation on panels, while asphalt and tile may retain more snow requiring attention to snow guards and panel tilt. Choosing material depends on lifecycle alignment, local weather resilience, and the homeowner’s budget.
Understanding lifespan and costs for these materials helps homeowners decide whether to pair roofing upgrades with solar installation for optimal long-term value.
What Are the Longevity and Cost Considerations for Solar-Ready Roofing Materials?
When deciding on a solar-ready roofing material, align expected roof lifespan with solar panel warranties to avoid costly rework; solar panels commonly carry 25-year performance warranties, so pairing with a roof that offers similar longevity reduces total lifecycle expense. Cost brackets vary: asphalt is typically lowest upfront, metal is higher but often pays back via durability and lower maintenance, and tile/slate has the highest initial cost with long lifespans. A budget checklist should include roof material cost, expected maintenance, potential reinforcement, and removal/reinstall costs if replacement later becomes necessary. Homeowners should weigh premium roofing investment against the avoided expense and downtime of removing panels for a mid-system re-roof.
These financial and lifespan considerations segue into the practical steps to assess and prepare a roof before installation in MA and RI.
How to Assess and Prepare Your Roof for Solar Panel Installation?
Assessing and preparing a roof for solar is a stepwise process that combines site analysis, structural review, any needed remediation, and permitting so the installation proceeds without surprises. A thorough site survey records orientation, tilt, shading patterns, obstructions, and usable area; installers use this to model expected energy production and layout. Structural inspection confirms framing and decking conditions and flags reinforcement or replacement needs; findings drive decisions about performing repairs before mounting hardware is attached. Permitting and documentation complete the prep phase—accurate records and certified structural reports speed approvals and utility interconnection. Taken together, these steps minimize risk and ensure the solar system performs as modeled for homeowners.
The practical how-to below breaks those steps into actionable items homeowners can follow or request from their installer.
- Schedule a discovery call to discuss goals and gather basic roof information from the homeowner.
- Complete an on-site survey to map orientation, pitch, shading, and usable roof area for panel layout.
- Conduct a structural inspection and load calculation; obtain engineer sign-off if reinforcement is required.
- Perform required roof repairs or replacement and install mounting flashings; preserve documentation for permits.
- Submit local permits and utility interconnection paperwork; coordinate final inspection and array commissioning.
Business integration note — Sunfinity Power’s assessment option:
Sunfinity Power offers an integrated assessment workflow that begins with a discovery call and savings report, followed by an in-house site survey and structural review to identify any roof prep needed before solar. Their teams can coordinate roofing repairs or full replacements and then proceed to solar installation to minimize handoffs and streamline permitting and inspection steps. Homeowners in Massachusetts, Rhode Island, and Connecticut can request a site survey and savings report to see how combined roof and solar options may lower upfront complexity. This integrated approach is a practical next step after the assessment checklist above.
What Is the Step-by-Step Process for Solar-Ready Roof Assessment and Preparation?
A detailed sequence keeps responsibilities clear and timelines predictable: start with homeowner education and a discovery call, then move to site survey, structural assessment, remediation, permitting, and final pre-install inspection. Typical timelines run from a few weeks for small repairs up to several months for full roof replacements and permit cycles; a structural engineer may be engaged if load calculations indicate reinforcement. Installers document each step—photographs, structural reports, and repair receipts—to support permit applications and warranty coverage. Clear communication about scheduling and interdependencies prevents rework, such as installing panels before addressing underlying roof issues.
This process description flows into local permitting considerations specific to MA and RI that affect timing and documentation.
How Do Local Permitting and Regulations in MA and RI Impact Roof Preparation?
Permitting requirements vary by municipality but commonly require structural documentation, a signed site plan, and signed contractor credentials; some towns also require separate roofing permits before solar permits are issued. Massachusetts programs like SMART and Rhode Island’s Renewable Energy Growth (REG) program influence interconnection and incentive paperwork, and utilities may have specific interconnection checklists that installers must satisfy. Typical municipal timelines range from a few weeks to a couple of months depending on workload and whether an engineering sign-off is necessary. Homeowners should contact their local building department early and provide the installer’s documentation package to avoid permit hold-ups.
Knowing which permits and program paperwork are needed leads naturally to understanding financial incentives and cost-support options available in the two states.
| Program | Eligible Expense | Typical Benefit | Notes |
|---|---|---|---|
| Federal ITC (Investment Tax Credit) | Solar equipment and often associated installation | 30% tax credit through 2032 | Consult tax advisor for eligibility; note timelines |
| Massachusetts state programs (e.g., SMART) | Solar production incentive | Varies by project size and tariff | Program specifics may affect project economics |
| Rhode Island incentives (e.g., REG-related mechanisms) | Production/incentive credits | Varies by program and interconnection | Check current program rules for applicability |
What Financial Incentives and Cost Options Support Solar-Ready Roofs in MA and RI?
Financial incentives reduce net project cost and can influence whether a homeowner chooses to replace a roof before installation. The federal Investment Tax Credit (ITC) currently offers a 30% credit applicable to qualifying solar equipment and installation costs through 2032; homeowners should consult a tax professional about eligibility and how roof replacement expenses might interact with credits. State-level production incentive programs in Massachusetts and Rhode Island provide additional value by supporting energy produced over time or offering upfront incentives, depending on program rules. Financing options—such as loans, PACE, leases, and company-specific $0-down or qualifying no-cost roof replacement offers—help homeowners manage upfront costs while aligning payments with energy savings.
After understanding incentives, homeowners should review financing vehicles to choose the best match for their financial situation and project goals.
- Federal ITC: Direct tax credit reducing federal tax liability equal to a percentage of eligible costs.
- State programs: Production-based or tariff incentives that provide value over time or upfront bonuses.
- Financing vehicles: Loans, PACE, leases, and $0-down company offers that can bundle roof replacement into the project cost.
Summary of financing considerations: combine available incentives with flexible financing to reduce upfront expense and match cashflow to energy savings.
Business integration — financing and no-cost roof options:
Sunfinity Power provides financing options and $0-down pathways and can evaluate whether a homeowner qualifies for a no-cost roof replacement as part of a bundled roof + solar project. Their team prepares a savings report and site survey to illustrate potential out-of-pocket costs after incentives and financing, helping homeowners compare the net benefits of replacing a roof before installation versus deferring work.
How Do Federal and State Solar Tax Credits Benefit Roof Replacement and Solar Installation?
Federal and state credits can lower net costs and sometimes influence whether roof replacement is included in the install scope; the ITC’s percentage applies to qualifying solar equipment and associated installation costs, but roof replacement treatment depends on tax guidance and project specifics. If roof work is integral to the solar installation (for example, necessary decking repairs directly tied to mounting), portions of those costs may be considered in some financing or incentive frameworks, though homeowners should seek tax advice. State programs may provide production incentives or tariffs that increase long-term project value, improving payback and financing terms. Using incentives and credits strategically can make combined roof and solar projects financially feasible for more households.
This fiscal overview leads to practical comparisons of financing vehicles for combined projects.
What Financing Options Are Available for Solar and Roofing Bundles?
Homeowners generally choose between cash purchase, loans, leases, PACE financing, and company-specific offers like $0-down or qualifying no-cost roof replacement programs that bundle roof and solar costs. Loans provide ownership with predictable payments, leases reduce upfront cost but limit some financial benefits, and PACE ties payments to property tax bills with long terms; each has trade-offs in payment structure and long-term value. Company bundling that offers $0-down or qualifying no-cost roof replacement can reduce immediate barriers and simplify coordination between roofing and solar work, but homeowners should review terms, warranty alignment, and total project cost. Asking for a transparent savings report and financing summary helps homeowners compare scenarios and choose the best path.
These financing choices set up the need for ongoing maintenance and warranty alignment once systems are installed.
How to Maintain Your Solar-Ready Roof and Maximize Longevity?
Maintenance for a solar-ready roof with panels focuses on regular roof inspections, debris and gutter management, and seasonal care for snow and ice to protect both the roof membrane and the array. Routine visual checks detect loose flashing, sealant degradation, or shingle granule loss; panels themselves should be inspected for secure attachments and wiring condition. In New England, snow management strategies—such as professional snow guards or safe removal practices—prevent heavy accumulation and thermal cycling damage. Proper warranty documentation and synchronized service plans for roof and solar components ensure repairs are handled with minimal downtime and without voiding coverage. Together, these maintenance steps preserve energy production and extend combined asset life.
A clear maintenance checklist follows to guide homeowners in routine care and signs that require professional attention.
- Quarterly visual inspections for loose mounts, damaged shingles, and clogged gutters.
- Annual professional inspection that includes flashing checks and electrical inspection of array connections.
- Seasonal snow/ice management planning with professionals to avoid DIY risks and roof damage.
- Immediate reporting and documentation of any leaks or panel movement to preserve warranties.
This checklist underlines why combined warranty planning and coordinated service plans are important.
What Are Best Practices for Roof and Solar Panel Maintenance?
Best practices include scheduled inspections, documentation of condition over time, gentle cleaning where necessary, and prompt professional repairs for seal failures or electrical faults. Homeowners should avoid rooftop DIY work that risks personal safety or damages system components; qualified technicians perform safe snow removal, sealant replacement, and electrical tests. Establishing an annual maintenance contract that covers both roof and solar checks simplifies care and ensures that one provider coordinates warranty claims and repairs. Keeping a dedicated folder with photos, invoices, and permit documentation helps when filing warranty claims or performing resale disclosures. These practices reduce the risk of hidden water intrusion and preserve energy yields.
Understanding warranty overlap is a logical next step to ensure coverage for both roof and panels.
How Do Combined Warranties Protect Your Solar and Roofing Investment?
Combined warranty strategies coordinate roofing manufacturer warranties, contractor workmanship warranties, and solar equipment warranties so coverage gaps are minimized and repair responsibility is clear. Roof materials often carry manufacturer warranties tied to material lifespan, while solar panels and inverters have separate performance and defect warranties; an integrated provider can align workmanship warranties to reduce friction if issues arise. Homeowners should collect and retain warranty documents, installation photos, and service records to support future claims and verify terms. When warranties are clearly documented and providers coordinate repairs, homeowners face fewer surprises and faster resolution for issues that involve both roof and solar components.
This warranty clarity supports confidence in choosing an integrated provider that manages both roof and solar responsibilities.
Why Choose Sunfinity Power for Integrated Solar and Roofing Services in MA and RI?
Sunfinity Power provides integrated in-house roofing and solar services that consolidate project management into a single point of contact, reducing coordination gaps between trades and minimizing schedule risk. Operating in Massachusetts, Rhode Island, and Connecticut, their teams offer discovery calls, savings reports, and on-site surveys to evaluate combined roof + solar options with local code and climate expertise. Financing pathways include $0-down options and processes to determine qualification for no-cost roof replacement where eligible, which can lower initial financial barriers and simplify the homeowner experience. Working with a single provider can streamline permitting, warranty alignment, and post-install support so homeowners receive cohesive documentation and a clear timeline.
What Are the Benefits of Sunfinity Power’s $0-Down and No-Cost Roof Replacement Options?
Sunfinity Power’s $0-down and qualifying no-cost roof replacement pathways are designed to reduce upfront costs and remove a common barrier to pairing a roof replacement with solar installation. For homeowners who qualify, these options can eliminate the need for separate financing and coordinate roof work so that panels are installed after new roofing is in place, avoiding later de-installation. The practical homeowner benefits include simplified scheduling, a single warranty and service path, and a consolidated savings report that shows net cost after incentives and financing. To determine eligibility, Sunfinity Power recommends a discovery call and site survey to assess roof condition, program fit, and financing options.
How Does Sunfinity Power Ensure a Seamless Solar-Ready Roofing Experience?
Sunfinity Power follows a coordinated project flow: discovery call → savings report and site survey → structural and permit documentation → roof preparation or replacement → solar installation and commissioning → activation and warranty handoff. In-house teams for both roofing and solar reduce handoffs between contractors, which helps maintain schedule fidelity and consistent quality control throughout the project. The company provides documented inspections and warranty alignment so homeowners have a single source for service requests, and they emphasize local expertise for MA and RI permitting and interconnection nuances. This integrated approach helps homeowners move from assessment to activation with minimal disruption and clear ownership of outcomes.
Final practical note: homeowners interested in combined roof and solar services can request a discovery call or site survey to get a tailored savings report and next-step plan from Sunfinity Power; local teams in Johnston, RI, serve Massachusetts, Rhode Island, and Connecticut and can help evaluate $0-down and qualifying no-cost replacement options.